ALAP Sampling Protocol
This is a “quick reference guide”. Refer to the sampling manual or training videos for a detailed explanation of the sampling protocol.
When dropping samples off at a hub you need to complete the chain of custody form provided at the hub. You can view an example here.
Resources
Equipment Checklist:
Boat
Anchor (strongly recommended)
Life Jackets
Cooler with Ice
Unlabeled 8”x10” Zip-Top Bag (1 per trip, per site) containing:
Sample Information Sheet
Small 125 mL Sample Bottle
Large 500 mL Sample Bottle
Labeled Sandwich Bag with Membrane Filter and Aluminum Foil
Rubber Band
Integrated Tube Sampler
1 Liter Mixing Bottle
Secchi Disk
Filtering Apparatus
Vacuum Hand Pump
Pencil
Tweezer
Sharpie Marker
Sampling Protocol
During the scheduled sampling week, travel to the deepest part of the lake and set an anchor. Fill out the Sample Information Sheet with appropriate descriptive information in pencil and label the sample bottles and plastic baggie with a permanent marker. Please test your writing utensil before heading out to sample. Some pens/markers do not work on a smooth, waterproof surface.
Thoroughly rinse the integrated tube sampler, mixing bottle and cap, and the two AWI sample bottles and caps with lake water at least three times each.
Lower the integrated tube sampler into the water to the 2-meter line. Insert the cork into the tube and pull the tube up from the string attached to the bottom so none of the captured water is lost. Empty the contents of the tube into the mixing bottle and mix thoroughly.
Place a membrane filter in the filter apparatus and make sure it is centered. Check to make sure both o-rings and the rubber stopper are in place. Assemble the filtering apparatus and pour 250 mL from the mixing bottle into the filter reservoir. Use the hand pump to filter the lake water. If, for some reason, you cannot filter 250 mL, please note how much water was filtered on the Sample Information Sheet. This is important when calculating a chlorophyll value.
When the 250 mL are completely filtered, disassemble the filter apparatus and remove the membrane filter with tweezers. It is helpful to release the pressure from the apparatus by removing the rubber stopper before attempting to remove the membrane.
Using tweezers, fold the filter in half (algae side in), then in half again so that it is a triangle, and wrap it in foil. Place the foil in the labeled plastic bag and immediately put it on ice. The chlorophyll will rapidly degrade if not kept cool and out of direct sunlight.
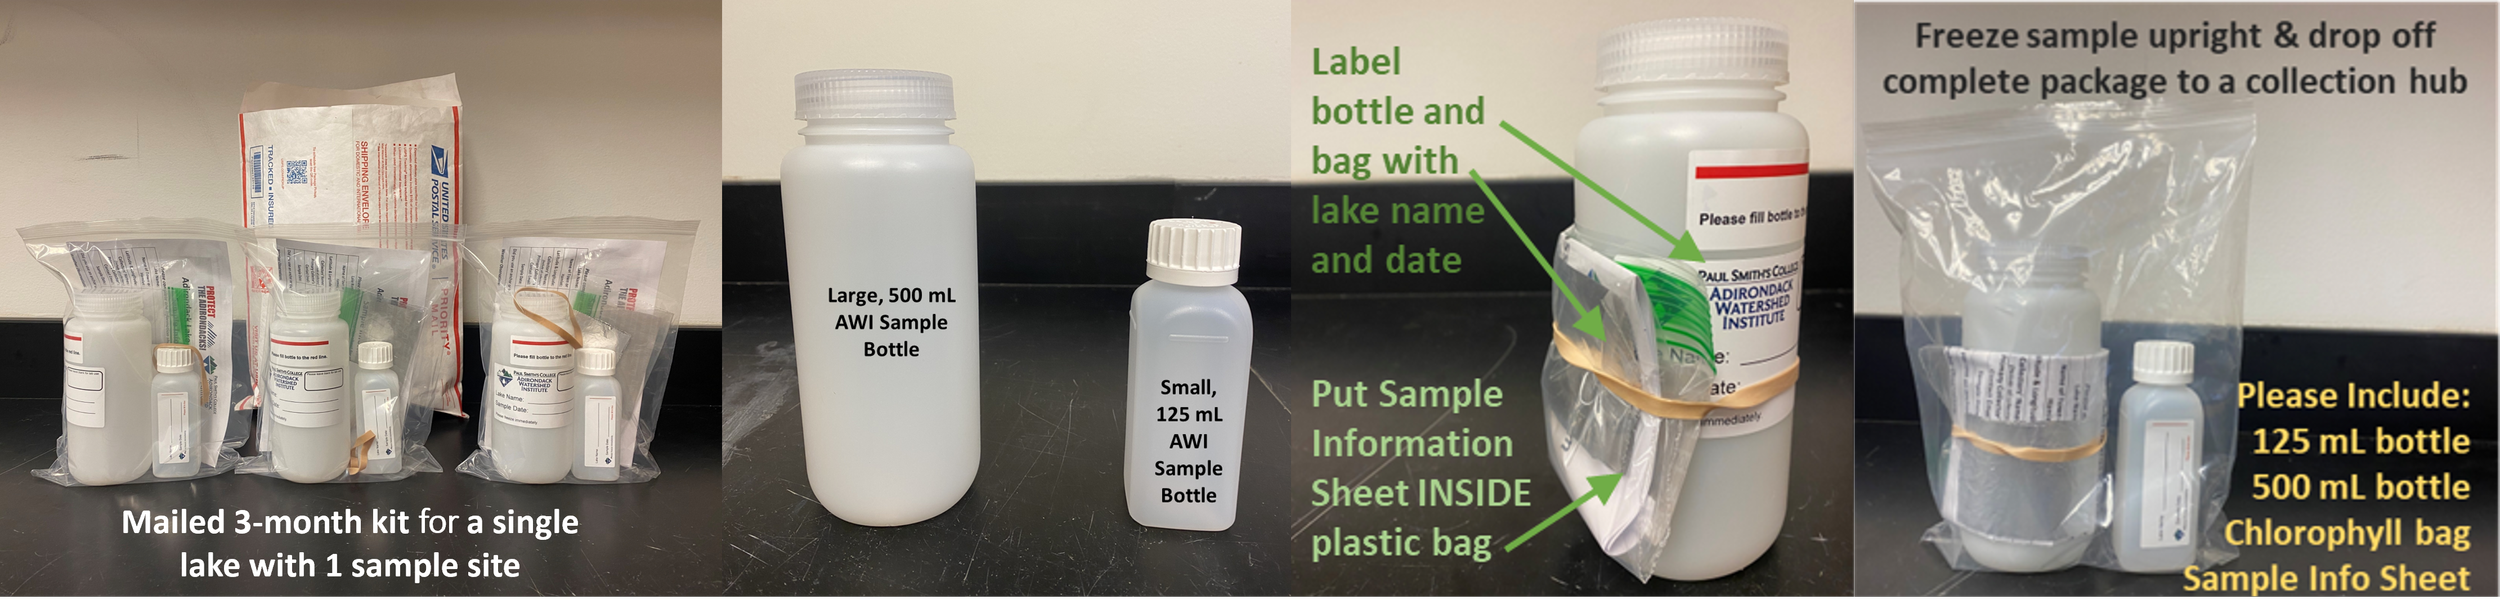
Fill the small, 125 mL AWI sample bottle first by pouring lake water from the mixing bottle. Only fill up to the red line indicated on bottle label. Filling over the red line may cause damage to the bottle when frozen. Cap the bottle and put it on ice until it can be frozen.
Then fill the large, 500 mL AWI sample bottle the same way with the remaining water from the mixing bottle or until the sample reaches the red fill line. Cap the bottle and put it on ice until it can be frozen.
Observe the Secchi transparency from the shady side of the boat by lowering the disk to the point where it disappears. Record the depth where it is no longer visible on the Sample Information Sheet as Secchi Depth Observation 1. Lower the disk another meter and then slowly pull it back up until it reappears. Record the depth that it reappears as Secchi Depth Observation 2. Check yes for “Is the Secchi disk visible and touching the bottom of the lake?” if you can see the Secchi disk sitting on the bottom of the lake, and record the depth.
Make sure the Sample Information Sheet is complete. Fold it up and place it inside the plastic bag with the filter, this is important to protect the paper during the freeze/thaw process. Attach the bag to the 500 mL bottle with a rubber band and put both sample bottles inside the larger 8”x10” unlabeled zip-top bag. Freeze immediately.
Drop the frozen sample off at the Paul Smith’s College Adirondack Watershed Institute or regional collection hub during the scheduled collection week. Complete a chain of custody form when dropping off your sample.